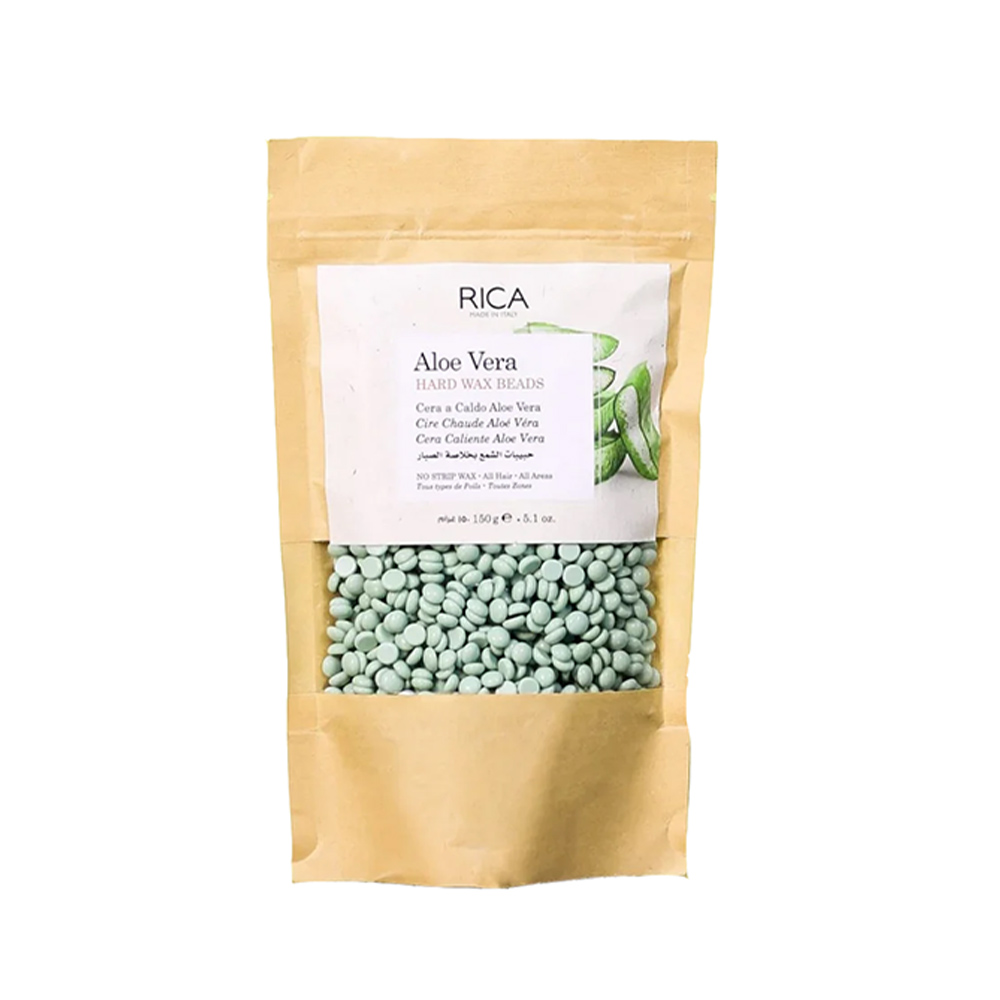
Rica Aloe Vera Brazilian Hard Wax Beads – 150g
₨1,700.00 Original price was: ₨1,700.00.₨1,350.00Current price is: ₨1,350.00.
Key Features:
- Aloe Vera Infusion: Aloe Vera is renowned for its soothing and hydrating properties, making it an ideal ingredient for sensitive areas such as the bikini line.
- Efficient Hair Removal: The hard wax formula adheres firmly to the hair without sticking to the skin, resulting in efficient hair removal with minimal discomfort.
- Gentle on Skin: Formulated to be gentle on the skin, reducing the risk of irritation and redness often associated with waxing.
- Flexible Application: The beads can be melted down to a pliable consistency, allowing for easy and precise application to the desired areas.
- Versatile Usage: Suitable for use on various hair types and lengths, making it suitable for both coarse and fine hair.
- Usage Instructions: Follow standard waxing procedures, including heating the beads to the appropriate temperature, applying a thin layer in the direction of hair growth, allowing it to cool and set, then swiftly removing it against the direction of hair growth.
- Aftercare: Recommend post-waxing care, such as applying a soothing lotion or oil to calm the skin and minimize redness.
Get additional Discount when you pay with your Direct Bank Deposit (UBL) — no extra taxes or surprise fees on online payments!
Add ₨5,000.00 to cart and get free shipping!
Out of stock
This product is currently sold out.
No worries! Enter your email, and we'll let you know as soon as it's back in stock.
222
People watching this product now!
Categories: Bath & Body, Body Treatment, Hair Removal, Rica
Description
How To Use:
Preparation:
- Start by ensuring the skin is clean, dry, and free from any oils, lotions, or creams. This helps the wax adhere better to the hair.
- If necessary, trim the hair to about 1/4 to 1/2 inch in length for optimal waxing results.
Heating the Wax: - Place the desired amount of wax beads into a suitable wax warmer.
- Follow the manufacturer’s instructions to heat the wax until it reaches a workable temperature. Hard wax typically melts at a higher temperature than soft wax.
Testing the Temperature:
- Before applying the wax to the skin, perform a small patch test on your wrist to ensure it’s at a comfortable temperature for your client.
Application:
- Using a spatula, apply a thick layer of wax in the direction of hair growth, starting from the outer edge and working towards the center.
- Ensure the wax covers the hair completely and extends beyond the area you plan to remove.
Allowing the Wax to Set:
- Let the wax cool and harden for a few seconds until it becomes firm but still pliable. You should be able to tap it lightly with your fingernail without it sticking to your skin.
Removing the Wax:
- Once the wax is set, quickly flick up one edge of the wax with your fingertip to create a tab.
Hold the skin taut with one hand and use the other hand to pull the wax off swiftly in the opposite direction of hair growth, parallel to the skin.
Repeat as Necessary:
- Continue applying and removing wax in small sections until you’ve covered the entire desired area.
Aftercare:
- After waxing, soothe the skin by applying a post-waxing oil or lotion to help calm irritation and reduce redness.
- Advise your client to avoid hot baths, saunas, and sun exposure for at least 24 hours after waxing to prevent further irritation.
Cleaning Up:
Use an oil-based remover or wipes specifically designed for wax cleanup to remove any residual wax from the skin.
Storage:
Ensure the container is tightly sealed after use to prevent contamination, and store it in a cool, dry place away from direct sunlight.


